Receiving a supplier shipment
The /inventory/receive batch flow — scan an invoice with the OCR scanner or enter items by hand, then push the received quantities into stock in one pass.
Quick reference
- Open /inventory/receive for a two-step batch-receive flow: delivery details first, then a search-and-add list of items you're receiving.
- For existing items, search and add lines — each line carries the current quantity and a receive-quantity field. Submit and every line writes a movement.
- For brand-new pieces, the invoice scanner (Scan Invoice button on the main /inventory page) reads a photo of the supplier invoice, extracts each item with quantity, cost, and a suggested retail price, and lets you confirm before importing.
- The OCR is well-calibrated on clean printed invoices and less so on handwritten ones — review every line before confirming.
- Supplier and supplier invoice number are optional but worth filling — they're what your finance hub uses to reconcile the stock-in against the invoice you'll later pay.
- PDF upload to the OCR scanner is not yet supported — upload a photo of the invoice instead.
Walkthrough
1. Decide which flow you need
Two paths:
- You're restocking pieces you already have rows for — say, a reorder of the 18" gold rope chain you already sell. Use the batch-receive flow at /inventory/receive to search-and-add each line.
- You're intaking brand-new pieces — a supplier sent a parcel of pieces you've never carried before. Use the Scan Invoice button on /inventory — the OCR creates new inventory rows for each invoice line as part of the import.
If a shipment is a mix of both, do the new pieces via Scan Invoice first (so they get rows), then use the receive flow to add the quantities of any restocked pieces. The two flows write to the same tables, so the end state is consistent either way.
2. Open the receive flow
Click Receive Stock from the top of /inventory or visit /inventory/receive directly. The page is split into two cards: Step 01 — Delivery details and Step 02 — Items received.
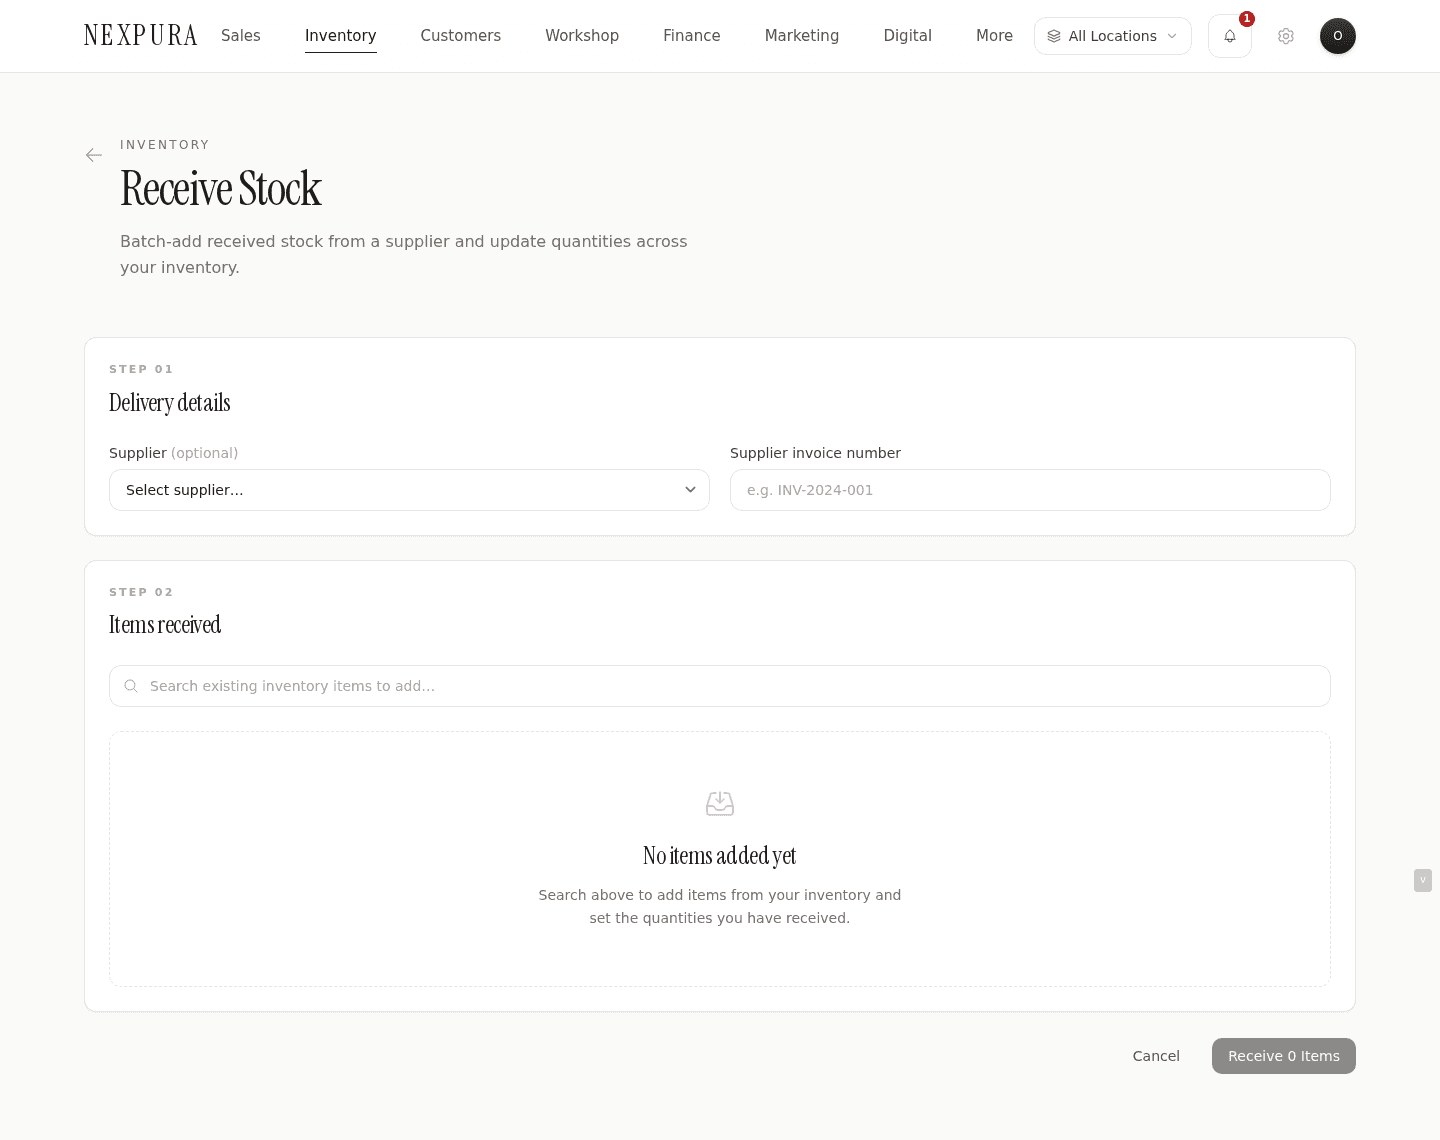
3. Step 01 — Delivery details
Two fields. Supplier dropdown — pick from your existing suppliers list (managed at /settings/suppliers if you need to add one first). Supplier invoice number — the reference printed on the invoice (e.g. INV-2024-001). Both are optional but recommended; they're what makes the stock-in reconcilable against the bill in your finance hub.
If you skip the supplier, every item received still gets a movement row, but the supplier_invoice_ref field on each item stays blank. You can fill it in later via Edit on each item, but doing it once at receive time is much faster.
4. Step 02 — Search and add items
The search input pulls from your active inventory — type a SKU or a piece of the name and matching rows appear in a dropdown underneath. Click a row to add it to the receive list; the search clears so you can type the next one.
Each added line shows: the piece name, its SKU, the current on-hand quantity, a number input for Receive quantity (defaults to 1), and a remove button. Click into the receive-quantity field and type the number of units you actually have in front of you from this shipment.
The total at the bottom of the card tallies as you add lines — handy as a sanity check against the invoice grand total.
Screenshot pending
Two lines added: a chain and an earring set, with current quantities and receive-quantity inputs. The total summary at the bottom counts the units across all lines.
5. Submit and confirm
Click Receive N Items at the bottom. The action calls batchReceiveStock server-side, which writes one purchase movement per line and updates each inventory row's quantity via the trigger. The page shows a green success banner (“Successfully received N item(s)!”) and redirects to /inventory after a two-second pause.
On the inventory list, the just-received items show their bumped quantities. Open any of them and the Stock Movement History panel shows the new Purchase row at the top, with the supplier and invoice reference (if you filled them) on the row note.
6. The Scan Invoice path (for new pieces)
From the main /inventory page, click Scan Invoice. A modal opens with an upload area — drop a photo of the supplier invoice (JPG, PNG, HEIC; PDF is not yet supported). The image goes to the AI parser; while it runs the modal shows a processing animation.
The parser comes back with the supplier name (matched against your existing suppliers) and a list of items extracted from the invoice — each with quantity, cost price, and a calculated retail price (the modal applies a default 2× margin you can change with the margin chips: 1.5×, 2×, 2.5×, 3×).
Screenshot pending
The Scan Invoice modal in the review step. Detected supplier at the top, item rows below with quantity, cost, suggested retail; margin chips above the list let you set 1.5x to 3x.
7. Review the extracted lines
Every row has a checkbox — selected by default but you can uncheck any line you don't want to import (the AI sometimes picks up the header row, or a sub-total line that isn't a real item).
Click into each cell to edit — the AI's read of the item name is usually correct but not always perfect; descriptions like “Earrings Studded” might want to become “9ct Studded Diamond Earrings” before they go into your catalogue. Cost price and quantity are usually accurate; retail is the AI's suggestion based on the margin chip you picked.
The OCR is well-calibrated on clean printed invoices and less so on handwritten ones. If your supplier ships handwritten dockets, treat the extracted list as a starting point and verify every figure against the docket before confirming. For typed PDFs printed to paper, the parse is usually line-perfect.
8. Confirm and import
Pick (or add) a supplier in the top section of the modal, click Import. Each checked line creates a new inventory row via quickAddStock: the name, cost, retail, and supplier come from the modal; quantity comes from the extracted qty; a stock number is assigned automatically (prefix S for owned stock or C for consignment, monotonic per tenant).
The import shows a progress bar as each row inserts. On completion the modal flips to a success state with the count and a link back to /inventory where the new rows now appear.
Screenshot pending
Import success screen showing the count of items added and a Done button. The new rows appear at the top of /inventory ordered by creation time.
Common questions
Can I upload a PDF invoice?
Not yet — the Scan Invoice modal accepts images only (JPG, PNG, HEIC). The modal will tell you so if you try to drop a PDF. Workaround: open the PDF in Preview / Acrobat / your phone's PDF viewer, screenshot or export each page as an image, then upload the image. We'll add native PDF support in a future release.
How accurate is the OCR?
On clean printed-and-emailed invoices: very accurate. Quantity and cost figures usually land line-perfect, item names land close. On handwritten supplier dockets, the parse degrades — the model can read printed numerals but handwriting depends on legibility. For handwritten shipments, treat the extracted list as a starting point and check every line. The review step is non-skippable specifically because of this.
What if the AI picks up the wrong supplier?
Click into the supplier dropdown in the review step and pick the correct one (or click + New Supplier to add one). The amber “Detected:” text shows what the AI thought; the dropdown selection is what actually saves.
What happens if the receive count doesn't match the invoice?
Receive what you actually have. If the invoice said 10 and you got 8, type 8 — the movement records exactly what came in. Add a separate adjustment with reason Supplier under-shipped for the missing 2 (see adjust stock), and follow up with the supplier on credit.
Why didn't my items get a stock number through /inventory/new?
That's by design. /inventory/new is meant for cataloguing pieces that already have a stock number written on the physical tag (so you can preserve the existing number). The Scan Invoice flow assigns stock numbers automatically because the pieces are arriving fresh and need numbers allocated. If you used /inventory/new and now want a stock number, type one in the field manually and save.
Where do these movements show up in reports?
In the Purchases line of your finance reports, and in the Stock Movement History on each item. If you set the supplier and invoice ref, the finance hub can also reconcile the stock-in against the supplier bill once you record the bill in the finance/expenses surface (see /docs/quotes-invoices-and-finance/expenses).
Troubleshooting
Scan Invoice modal says “No items found”
Symptom: the OCR finishes but the review step is empty or the modal returns to upload with an error. Cause:the image is too low-resolution, too dark, or the invoice format wasn't recognisable as a line-item list (e.g. it's a quote, a delivery docket without prices, or a free-form note). Fix: retake the photo with the invoice flat under good lighting, or fall back to manual receive at /inventory/receive for the items you already have rows for, plus /inventory/new for any new pieces.
An item I searched for in receive doesn't appear
Symptom: typing the SKU or name in the receive search returns no matches. Cause:either the item doesn't exist (a new piece — use the Scan Invoice path instead), it's archived (search ignores soft-deleted rows), or you have location restrictions and the item lives at a location you can't see. Fix: open /inventory first and verify the row exists from your scope. If it's archived and shouldn't be, contact us to restore. If it's genuinely new, use Scan Invoice or /inventory/new.
Receive succeeded but the quantity is wrong
Symptom:the success banner showed, but when you open the item the quantity didn't match what you typed. Cause: rare, but possible if a parallel sale or transfer ran while the receive was processing — the trigger applies your quantity_change to the row's current value, so other concurrent writes interleave. Fix: open the item, compare the Stock Movement History against what actually happened, and reverse any erroneous rows with an adjustment. If the discrepancy is large or recurring, contact us with the item ID.
Scan Invoice import partially failed
Symptom: the progress bar finished but the final count is lower than the number of items you confirmed. Cause:one or more row inserts failed — usually because a required column rejected a null value, or the cost/retail field couldn't parse as a number. Fix: open /inventory and check which items did land. For any missing, redo via /inventory/new manually with the values that should have been on the row. Send us the invoice photo at /contact so we can tune the parser if it's a recurring failure pattern.
Related
- Inventory overview — how movements roll up into the row
- Adding an inventory item — the manual single-piece flow
- Adjusting stock and viewing history — reconciling under/over shipments
- Memo and consignment — when a shipment is on consignment terms
- Recording supplier expenses — closing the loop on the invoice