POS overview
How the Nexpura POS surface works — product grid, cart, customer attach, payment methods, and the receipt flow. The model the rest of this section builds on.
Quick reference
- The POS lives at /pos. Two-pane layout: product grid on the left, cart on the right.
- The product grid reads from
inventoryfiltered to active items with quantity > 0. Sold-out and archived pieces drop off the grid; you can't accidentally ring up something that isn't there. - Add to cart by clicking a tile, scanning a barcode (any keyboard-wedge scanner works — the page listens page-globally), or using the camera-scan button.
- Customer attach is optional for cash/card sales, mandatory for store-credit, voucher, and layby. Search by name or email; create a new customer inline if they aren't in your list yet.
- Six payment surfaces in the modal: Card, Cash, Store credit, Split, Voucher, Layby. Card uses your connected Stripe terminal when configured; otherwise records as a manual card payment.
- On completion the page swaps to a success screen with New sale, Print receipt, Email to customer, and View invoice — every POS sale auto-creates an invoice in the background.
The shape of the layout
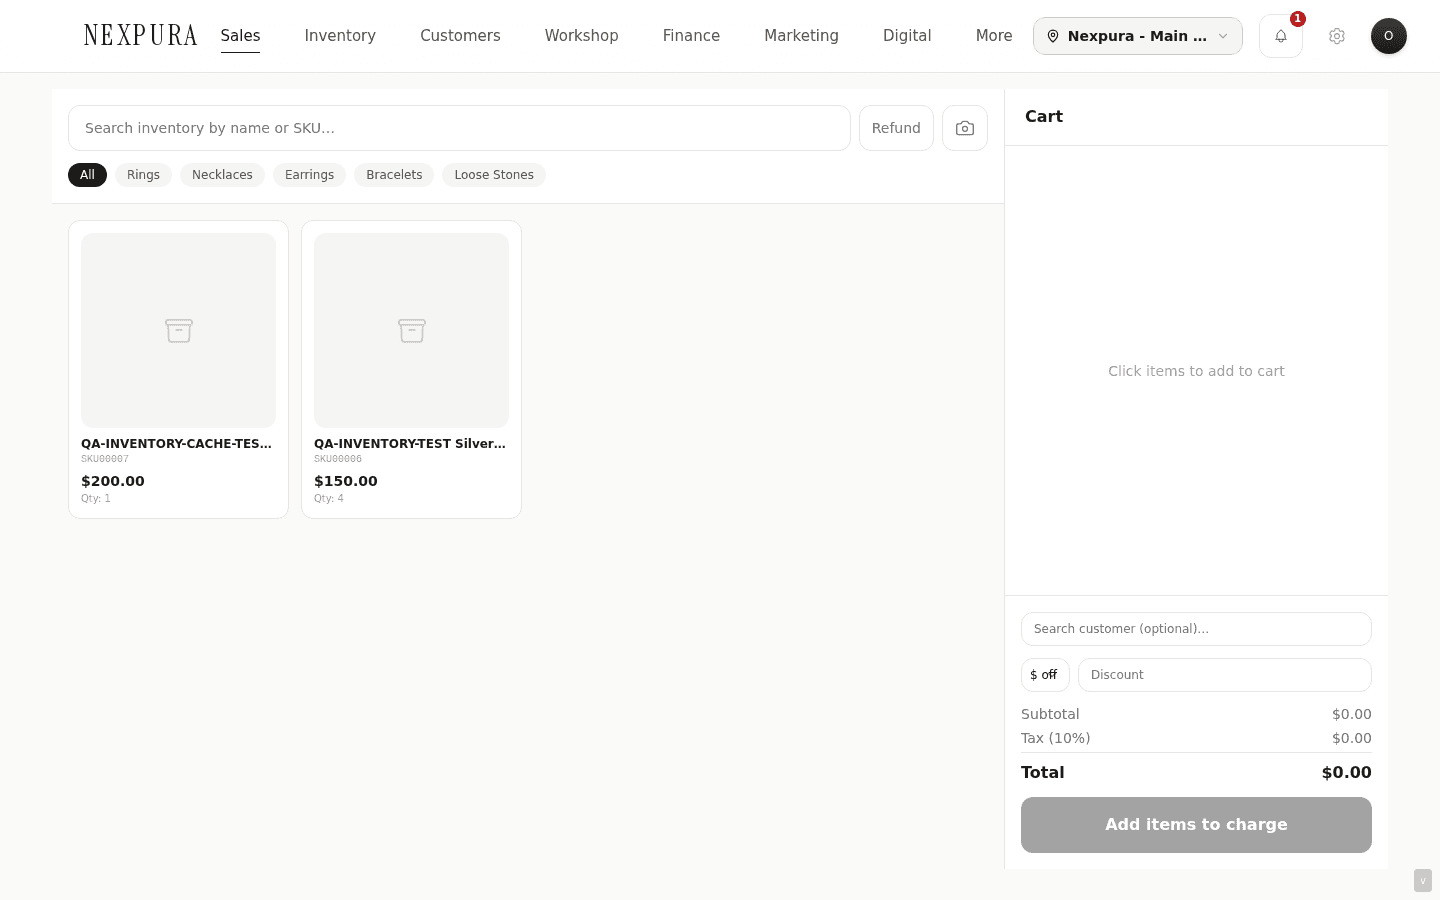
1. The product grid (left pane)
The left pane shows your active inventory as a tiled grid — image, name, SKU, retail price, on-hand quantity. The search bar at the top filters by name or SKU as you type; the category pills below it filter by jewellery type (Rings, Necklaces, Earrings, Bracelets, Watches, Loose stones, Other).
The grid only shows items where status = 'active' AND quantity > 0 AND deleted_at IS NULL. A piece that just sold out drops off the grid on the next refresh — the page re-fetches inventory after every completed sale, so successive ring-ups see fresh quantities and you can't double-sell the last one.
2. Barcode scanning
Two paths into the cart from a barcode. The first is a keyboard-wedge scanner — the kind that types out the barcode characters followed by Enter. The page listens page-globally for rapid keystrokes; if a SKU-matching string arrives with a terminating Enter, the matching item is added to the cart. Nothing to plug in or configure — most off-the-shelf scanners just work.
The second is the camera-scan button — useful on a phone or tablet without a physical scanner. Tap it, point the camera at a barcode, and the item joins the cart.
If a scan doesn't match any active inventory SKU, the cart shows “No item found for "<barcode>"” rather than silently swallowing the scan — staff know the scanner registered the read but the SKU isn't on file.
3. The cart (right pane)
The right pane lists every line in the current sale — name, quantity controls (− / +), line total, and an x to remove. The quantity + button is capped at the item's on-hand quantity, so the cart can never exceed available stock at the source location.
Below the lines, the footer shows running totals: subtotal, discount (if any), tax (using your tenant tax rate), grand total. The Discount selector is dollar or percent off the cart subtotal — discount values are clamped so a 110% discount can't turn a $100 cart into a negative total, and a $5,000 dollar-off on a $100 cart can't either.
Screenshot pending
Cart pane mid-sale with three line items, quantity steppers, a 10% discount applied, subtotal/tax/total stack at the bottom, and the green Charge button.
4. Customer attach
The customer field is at the bottom of the cart, above the discount selector. Start typing to search by name or email; matching customers surface in a dropdown — click to attach. The selected customer's store-credit balance becomes available as a payment method once attached.
Attaching a customer is optional for the basic cash/card flows — a walk-in can pay and walk out without leaving a record. It's required for Store credit (needs a customer to pull credit from), Layby (the layby is owned by the customer), and any flow that emails a receipt or voucher.
If the customer isn't in your list yet, jump to /customers/new in a new tab, create them, then come back and search — they surface immediately (the dropdown re-queries on every search change).
5. The payment modal — six surfaces
Click the green Charge $X.XX button to open the payment modal. The modal has a tab strip across the top with six payment surfaces; each tab is an independent flow:
- Card — if Stripe is connected, this records a card sale (your physical terminal handles the tap; Nexpura records the result). Without Stripe, it records as a manual card payment with a link to /settings/payments for connecting.
- Cash — type the amount tendered; the modal computes change. Won't complete until tendered ≥ total.
- Store credit — customer-required. Shows their available balance with a check/cross indicator; blocks completion if balance < total (with a hint to use split payment).
- Split — three modes: cash + card, voucher + card, voucher + cash. The two amounts must sum to total (cent tolerance applied); the modal validates and shows the current shortfall live.
- Voucher — type or paste the voucher code, click Look up, the modal shows the balance. If balance ≥ total, redeem the voucher for the full sale; if it's less, the modal hints to use a split.
- Layby — customer-required. Type a deposit (must be less than total — full payment means a regular sale instead); on submit a layby record opens at /laybys and the customer takes the deposit receipt while the piece stays on the shelf until the balance is paid.
Screenshot pending
Payment modal showing the six tab strip (Card · Cash · Store credit · Split · Voucher · Layby), the Amount due dollar amount, and the active Card tab with a single Record card payment button.
6. What happens on completion
When a sale completes, a few things run server-side in one atomic saga: stock is decremented (with sold-out detection and whole-cart rollback if any item just slipped out from under you), store-credit and voucher amounts are debited, the sale row is written, sale-item rows are inserted, and an invoice is auto-created with a link back to the sale.
The success screen swaps in over the cart with the sale number, total, and (for cash) the change due. Action buttons: New sale (resets the workspace to an empty cart for the next customer), Print receipt (opens a thermal-receipt PDF in a new window — formatted for 80mm receipt printers), Email to customer (sends a PDF receipt via Resend if the customer has an email on file), View invoice, and — if the sale included a finished piece — Issue passport as a shortcut to the verify-passport flow.
Screenshot pending
Sale success screen with the green check, sale number S-0042, total $1,250.00, change of $50.00, and the action stack: New sale (primary green), Print receipt, Email to customer, View invoice, Issue passport, View sales history.
Common questions
Can I run the POS without Stripe connected?
Yes — cash, store credit, voucher, layby, and split-payment flows don't need Stripe at all. The card tab still works without Stripe: it records as a manual card payment (the customer's card was charged on a separate terminal, and Nexpura just records the result). Stripe connection is for native card-tap UX where the terminal is wired to Nexpura directly.
Why doesn't an archived item show up in the POS grid?
The grid filters to status = 'active' AND quantity > 0 AND deleted_at IS NULL. Archived items (soft-deleted via /inventory) fall out of all three conditions. If you need to ring up an archived piece, un-archive it first — open the inventory detail page and clear its archived state.
What stops two cashiers selling the same one-of-a-kind piece at the same time?
Stock deduction runs through the pos_deduct_stock database function with row-level FOR UPDATE locks per inventory row. Two terminals trying to ring up the same serialized piece will serialise — the first lands, decrements quantity to 0; the second hits the lock, then sees quantity is 0 and rejects with "X just sold out while you were checking out." No partial deduction, no phantom paid sale.
Why is an invoice auto-created on every POS sale?
Two reasons. First, customers who want a tax-invoice receipt have one already prepared — no separate “make me an invoice” step at the counter. Second, the invoice surface is what your accounting integrations (Xero) sync against; if you ever connect Xero, the POS sales are already in the right shape to flow across. The auto-invoice is created in the same saga as the sale, so a sale row never exists without a matching invoice.
Does the POS work on a phone or tablet?
Yes — the layout collapses to a stacked single-column on narrow screens (cart below the grid), the quantity steppers and tab buttons are sized for touch (≥44px), and the camera-scan option replaces the keyboard-wedge scanner. Most stores run a tablet as a secondary till alongside a desktop main till; both share the same inventory backend in real time.
Can I use the POS to sell something that's not in inventory yet?
No — every cart line resolves to an inventory row. If you want to ring up something you haven't added yet, jump to /inventory/new, save the item with quantity 1, then it surfaces in the grid for ringing up. For repair charges and service fees, use the manual sale flow — that supports free-text line items without a stock row behind them.
Troubleshooting
Barcode scanner isn't registering
Symptom:scanning a piece doesn't add anything to the cart and no error shows. Cause:the page keyboard listener pauses while a modal is open (payment, refund, camera scanner) so a scan during checkout doesn't get captured by the wrong handler; OR your cursor focus is in an input field that isn't the barcode field, so the keystrokes are typed into that input instead. Fix:close any open modal, click anywhere on the empty page background to drop focus, and re-scan. If the scanner is reading characters but no Enter terminator arrives, check the scanner's suffix configuration — most scanners default to CR (Enter); some come configured for CR+LF or LF only.
“X just sold out while you were checking out”
Symptom: charging the cart errors with this message even though the cart quantity matched the on-hand number when the items were added. Cause:another terminal or another sale ran through between the cart build and the charge click — the database's atomic stock-deduction caught the conflict and rejected the whole sale (rather than partially fulfil and oversell). Whole-cart-or-nothing. Fix:remove the flagged item from the cart and re-add — the grid re-fetches inventory after each completed sale, so the current quantity is correct. If the cart is large and you don't want to start over, the page state is preserved — only the conflicting line needs the remove + re-add.
Cart cleared unexpectedly mid-sale
Symptom: you had a cart built up, walked away for a minute, came back to find it empty. Cause:the page navigated away (intentionally or accidentally) — cart state lives in the page's React state, not in a persistent store, so a navigation clears it. Fix:we hold soft page reloads (the kind that fire on a deploy mid-session) while a cart has items in it, so a deploy won't lose the cart silently — but a manual back-button click or a browser refresh still clears. Re-build the cart; for big custom assemblies prefer the manual sale page which saves a draft.
“Client total mismatch” on charge
Symptom:the payment modal shows an error like “Expected $X.XX, got $Y.YY”. Cause: the server recomputes every total from the cart contents using your tenant tax rate, and rejects any sale where the client-claimed total differs by more than a cent. Usually this means your tenant tax rate changed (e.g. you flipped GST on or off in settings) while the POS page was open with a stale rate cached client-side. Fix: hard-refresh the POS page (Cmd/Ctrl-Shift-R) to pull the new tax rate, then re-build the cart.