Mailchimp integration
Connect your Mailchimp audience by API key, sync customers with marketing consent to your audience, and let Nexpura keep the cohort in agreement on a schedule. Consent-gated by design — only customers who opted in to marketing flow to Mailchimp.
Quick reference
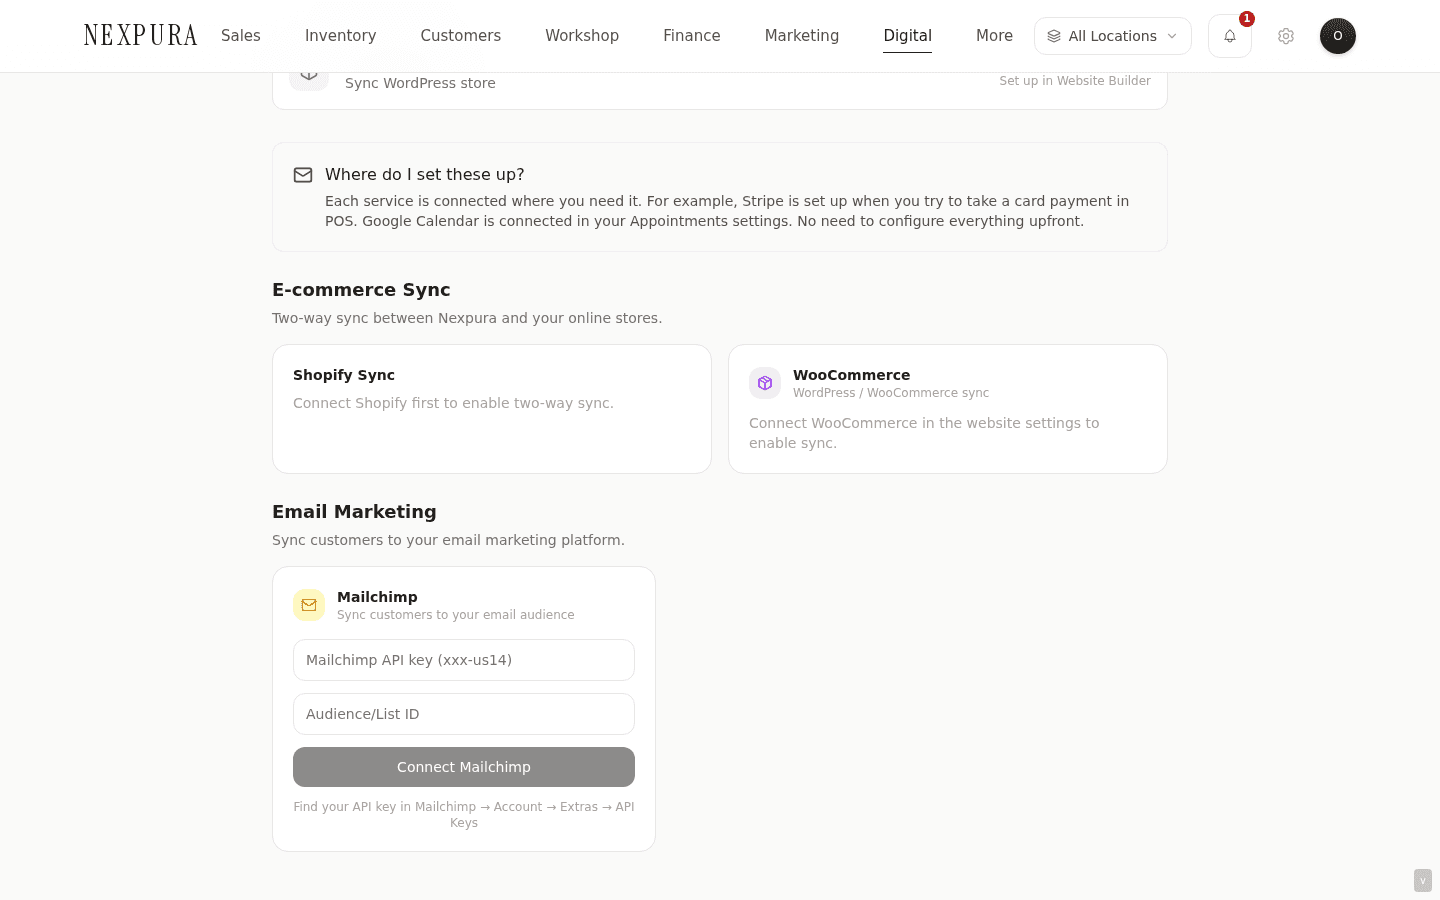
- Connection happens inline on the /integrations page, in the Email Marketing section. There's no separate configuration surface — the connect form and the post-connect Sync Now button live in the same panel.
- Two credentials: a Mailchimp API key (format
xxxxx-us14— the suffix identifies your Mailchimp server) and an Audience / List ID (found under Audience → Settings → Audience name and defaults in Mailchimp). Both required. - Optional auto_sync toggle at connect time. When on, Mailchimp gets a scheduled sync alongside the manual button; when off, sync is on-demand only.
- Sync writes every customer with marketing_consent = true to your Mailchimp audience as a subscribed member, mapping first name, last name, and phone into Mailchimp's standard merge fields. Customers without consent are never written.
- Existing members in Mailchimp aren't overwritten destructively — Mailchimp's upsert handles the update / create decision on email match. If a customer is already in Mailchimp and you write the same email, the merge fields update; the subscription status doesn't flip just because Nexpura sent the row.
- Disconnect happens from the same panel. The integration row stays for the audit trail; the API key is cleared from the encrypted config.
Connecting Mailchimp
1. Get your API key from Mailchimp
Open Mailchimp in another tab. Click your account icon in the top right, then Account & billing → Extras → API keys. If you don't have a key yet, click Create A Key; otherwise copy an existing one.
The key looks like a1b2c3d4e5f6g7h8i9j0-us14 — a hex string, a hyphen, and a server prefix (us14, eu1, etc.). The server prefix is the part that tells Nexpura which Mailchimp data centre to call; the connect form parses it from the key's suffix automatically.
2. Get your audience / list ID
In Mailchimp, go to Audience → All contacts. Pick the audience you want Nexpura customers synced to. Click Settings → Audience name and defaults. The Audience ID is shown at the bottom of the form — typically a 10-character alphanumeric string (e.g. abc123def4). Copy it.
Screenshot pending
The Mailchimp Audience name and defaults screen with the Audience ID visible at the bottom. The ID is what Nexpura uses to know which audience to push subscribers into.
3. Paste both into Nexpura
Go to /integrations. In the Email Marketing section, the Mailchimp panel shows two text inputs (API key and Audience / List ID) and a Connect Mailchimp button. Paste both values, click Connect.
Nexpura verifies the credentials by calling Mailchimp's API for the named audience. On success, the panel re-renders with the Sync Now button and the integration row is written.
Syncing customers
1. The cohort: marketing-consent customers
The sync reads from /customers but filters to customers whose marketing_consent flag is on. Every other field on the customer record is irrelevant to whether the row gets pushed — consent is the gate.
Practically: a customer who came in through a walk-in POS sale without opting in to marketing won't show up in Mailchimp. A customer who ticked the marketing box at intake will. The control is captured at the point of capture; the sync respects it.
2. Click Sync Customers Now
On /integrations, the connected Mailchimp panel shows a Sync Customers Now button. Click it. The sync walks every marketing-consent customer, builds the Mailchimp member shape (email + first / last name + phone in merge fields), and posts to Mailchimp's members upsert endpoint for your audience.
On completion, the panel shows a count — “✓ Synced 142 subscribers”. Repeat clicks are fast; Mailchimp's upsert recognises members already in agreement.
3. Auto-sync (when on)
The auto_sync flag (set at connect time and stored in the integration config) controls whether the scheduled sync runs on a cadence. When on, the sync fires daily in the background; when off, the panel is on-demand only.
The scheduled sync is the same code path as the manual button — it picks up new marketing-consent customers, new attribute changes on existing customers, and opt-outs (a customer who toggled marketing consent off on a return visit is unsubscribed from the audience on the next sync). The cadence is daily; thelast_sync_at timestamp on the integrations row is your visibility into when it last ran.
Common questions
Why are some customers not appearing in Mailchimp after sync?
The sync filters by marketing consent — customers who haven't opted in are deliberately not pushed. This is the contract Nexpura makes with the customer (their consent is captured once and respected everywhere), not a configurable behaviour. If a customer should be in Mailchimp and isn't, the question to check first is whether their marketing_consent flag is on.
Open the customer's detail page. The marketing-consent flag is on the Overview tab. If it's off and the customer should be in Mailchimp, the consent capture probably didn't happen at intake — flip the flag (with the customer's permission), re-sync, the customer shows up next run.
What happens if I have an existing Mailchimp audience with subscribers Nexpura doesn't know about?
Nothing destructive. The sync only writes into the audience — it doesn't delete or unsubscribe members that exist in Mailchimp but not in Nexpura. Your pre-existing audience members stay where they are; Nexpura's consenting customers are added alongside them.
The only outbound-influence path is the opt-out described above — when a Nexpura customer toggles marketing consent off, the next sync unsubscribes them from the audience (writes their member status to unsubscribed). That's the consent contract being honoured back across the integration; it's not a wider audience-cleanup behaviour.
Can I sync to multiple Mailchimp audiences?
Not today — one Nexpura tenant connects to one Mailchimp audience. The integration row holds a single audience ID; configuring a second audience would require either a multi-row integration model (which Nexpura's schema doesn't support yet) or running multiple Nexpura tenants in parallel (which is its own discussion).
The practical workaround is to use Mailchimp's tag / segment features within a single audience — Nexpura pushes everyone into one audience, then you segment in Mailchimp by tag, customer attribute, or campaign engagement. Most multi-list use cases turn out to be segments-within-one-audience anyway.
The API key shows as “xxx-us14” — is the suffix important?
Yes. Mailchimp's API is sharded by data centre. The suffix on the API key (us14, eu1, etc.) tells Nexpura which Mailchimp server URL to call — without it, the connect step can't reach your audience.
The connect form parses the suffix from the key's value automatically — you don't enter it separately. If the suffix is missing (someone trimmed it before pasting), the connect step returns an error and the default of us1 isn't a safe fallback. Copy the full key from Mailchimp including the suffix.
Troubleshooting
Connect returns “Mailchimp API error”
Symptom: the Connect button posts and returns an error banner with a Mailchimp-shaped message. Cause:the API key isn't accepted by Mailchimp. Three common causes: (1) the key was revoked, (2) the key was copied without its suffix, (3) the audience ID belongs to a different audience than the API key has access to (Mailchimp allows per-key audience restrictions). Fix: in Mailchimp, confirm the key is active under Account → Extras → API keys, copy the full key including suffix, and try the connect again. If the audience-restriction case applies, use a key without restrictions or use the audience ID the restricted key has access to.
Sync Now returns “Audience not found”
Symptom: the connection worked, but Sync Now returns an audience-not-found error. Cause: the audience the Audience ID points to was deleted in Mailchimp after the integration was connected. Fix: disconnect Mailchimp from the panel, then go through the connect flow again with the new audience's ID. The disconnect clears the stale audience reference; reconnect points at the live one.
A subset of customers fail with “invalid email”
Symptom: the sync banner shows a partial-success — some customers synced, others failed with email-format errors. Cause:the email values on those customer records aren't well-formed (typo at intake, a partial email likename@, a placeholder). Fix: the error message includes the offending customer IDs. Open each in /customers and correct the email; re-run Sync Now. Mailchimp upserts on email so the corrected record lands as a new member rather than a duplicate.
The integration shows connected but auto-sync hasn't run for days
Symptom: the Mailchimp row is green; the last-sync timestamp is days old even though you connected with auto_sync on. Cause: auto-sync only writes the timestamp on runs that had at least one row to push. If your customer cohort hasn't changed since the last sync, the timestamp stays where it was. Fix: click Sync Now once. If the manual sync succeeds, the integration is fine — the timestamp updates and auto-sync continues normally. If the manual sync errors, that error is the actual problem and should match one of the entries above.