Adding your first location
Set up a location so inventory, repairs, bespoke jobs, and sales know where they live.
Quick reference
- Locations live at
/settings/locations. - Types are Showroom, Workshop, Warehouse, Office, or Other.
- You don't need multiple locations — a one-store setup is fine with a single Showroom row.
- Team members can be restricted to specific locations from
/settings/team. - Your plan caps how many locations you can have; the page shows the cap if you're close to it.
Walkthrough
1. Open the Locations page
From the workspace, navigate to /settings/locations. The page lists every location for your tenant; on a brand-new account, it's empty.

2. Add a new location
Click Add location. A form expands with three groups: basic info (name + type), address, and contact (phone + email). The store name is the only required field; everything else is optional but recommended because the address shows on receipts handed out at that location.
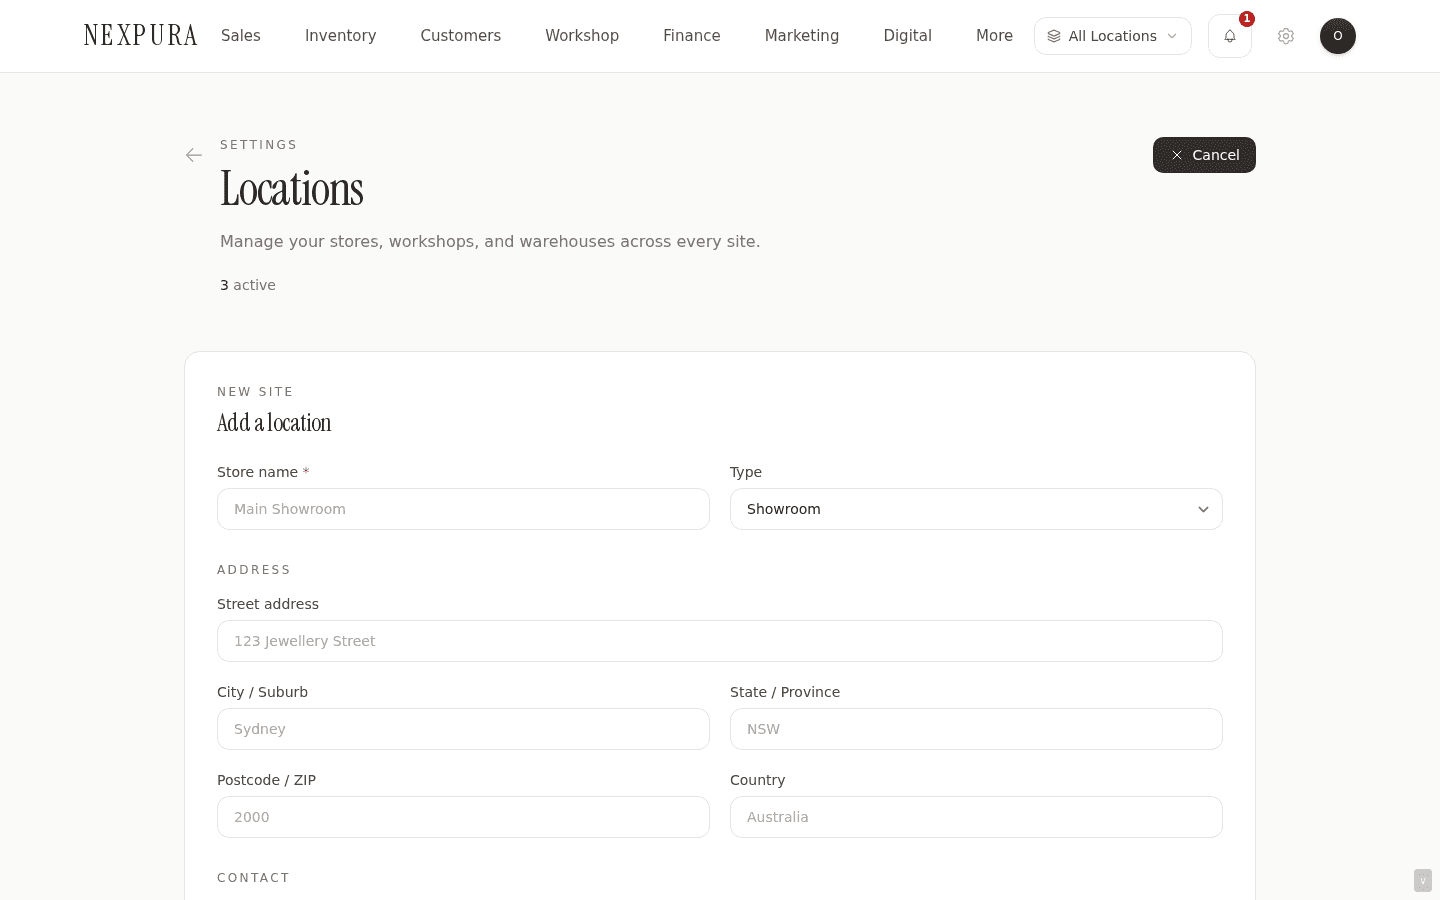
3. Pick the location type
The type dropdown has five values: Showroom, Workshop, Warehouse, Office, Other. The type is informational — it doesn't currently gate features. Pick the one that matches how staff actually refer to the location. A single-store jeweller is usually a Showroom; a bench-only annex is a Workshop; an off-site stockroom is a Warehouse.
4. Fill in the address and contact
The address fields are: street address, city / suburb, state / province, postcode, country. State and country accept free text — they're not dropdowns on this form. Phone and email are for the location specifically; they appear on receipts printed from that location and on the storefront subdomain's contact section if you list multiple locations there.

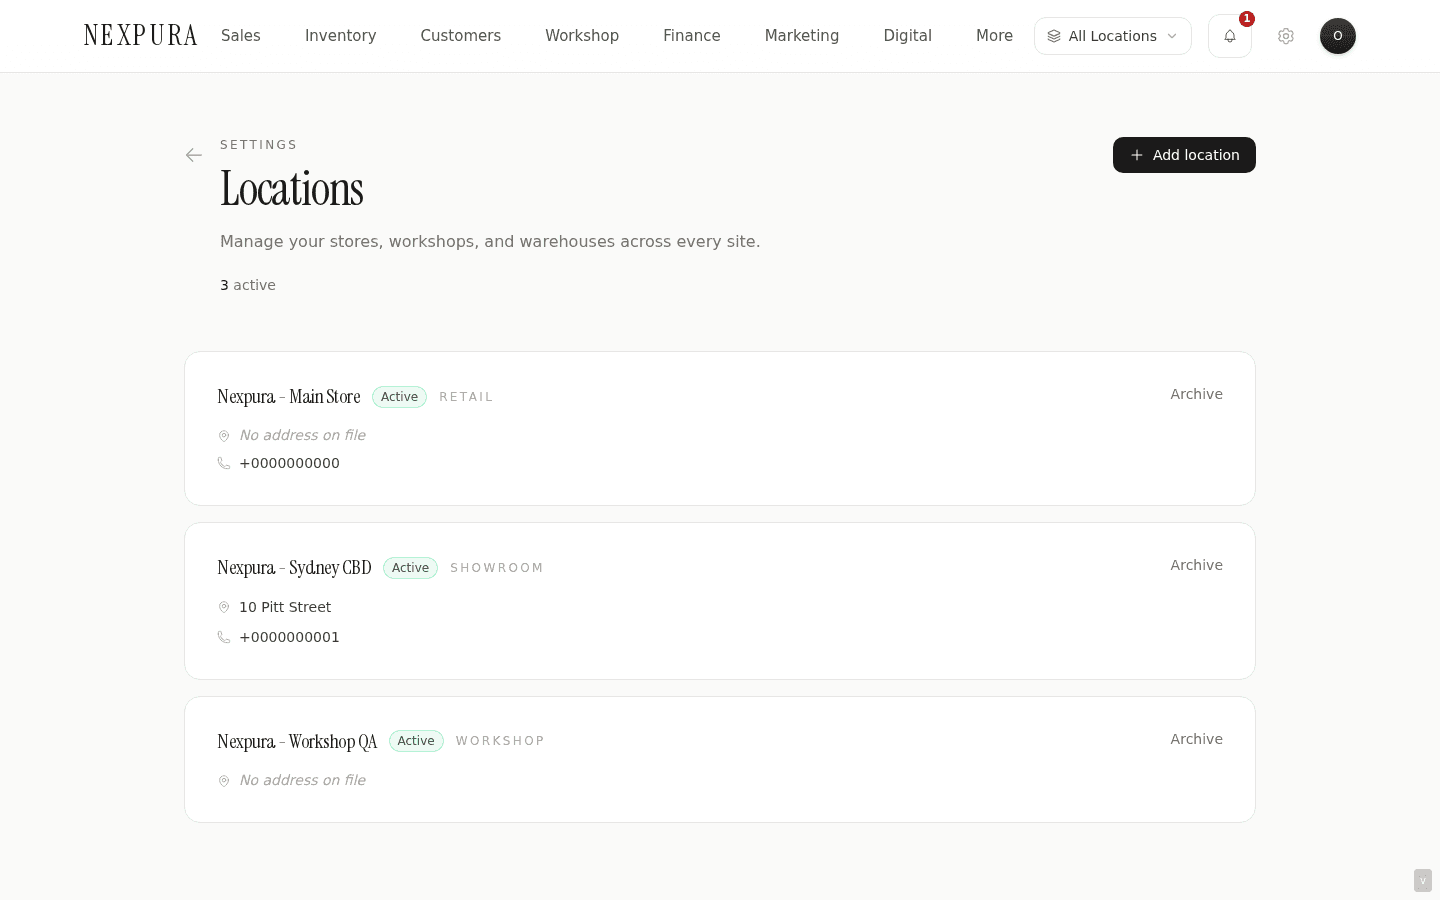
5. Save and verify
Click Add location. The form collapses and the new row appears at the top of the list with an Active badge. The header counts (active / archived) update in real time.
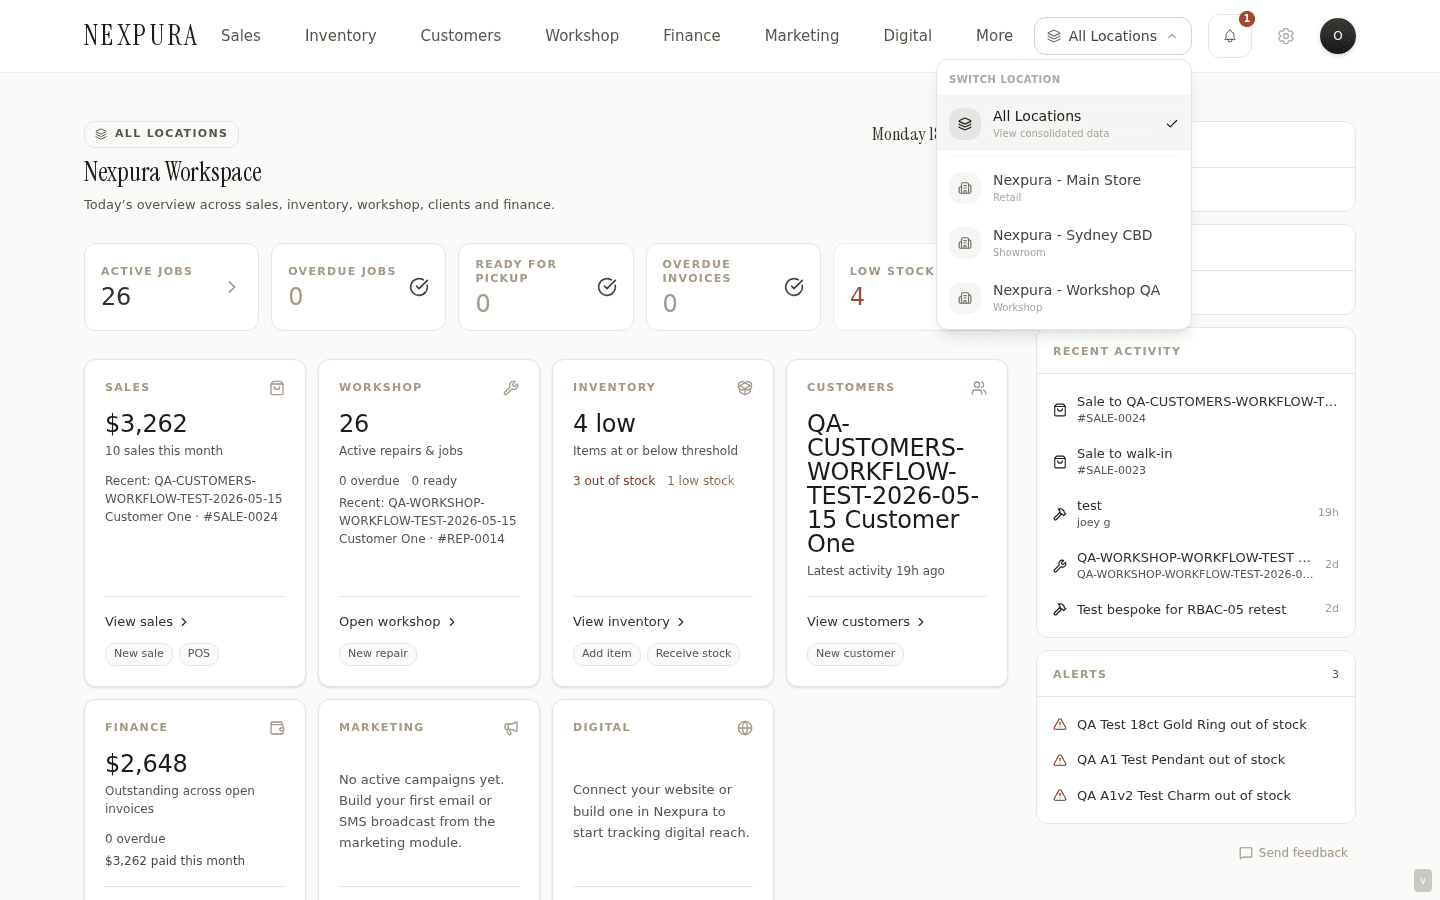
6. Confirm the location switcher
Open the dashboard. The header has a location switcher that lists every active location for your tenant. Your new location appears there immediately; if you have just one, the switcher will show that single value (it doesn't hide when there's only one). Switching changes which location new inventory, repairs, and sales are created against.
Common questions
Do I need multiple locations to use Nexpura?
No. A single-store setup with one Showroom row works for the full feature set. Multi-location is there for jewellers running more than one site — second store, bench annex, off- site stockroom — but a one-row setup behaves exactly like a normal single-store POS, just with a switcher in the header showing one option.
What's the difference between a Showroom and a Workshop?
For now, type is informational — it doesn't restrict which actions can happen there. A Workshop-type location can run POS sales, hold inventory, and take repairs in just like a Showroom can. The distinction is for your team's mental model and for the labels that appear on receipts and dashboards. We may use type to scope features (e.g. hide POS on a Warehouse) in the future; we don't today.
Can I restrict a team member to specific locations only?
Yes — open /settings/team, click the member row, and use the location-restriction modal to select which locations they can see. A restricted member only sees inventory, repairs, sales, and reports for their assigned locations. Owners and managers are not restrictable; staff and technician roles are. See the inviting your team page for the full workflow.
How many locations can I have?
Your plan caps the total. Boutique is single-location; Studio and Atelier raise the cap progressively. The locations page shows your current usage against the plan ceiling near the header (e.g. “3 of 5”), and the Add location button disables with an upgrade prompt when you hit the cap. Open /billing to upgrade.
Can I move inventory between locations?
Yes. Multi-location transfers are a separate workflow covered in the Inventory section — see multi-location transfers. The short version: open the item, transfer to another location, the count moves in one transaction.
Troubleshooting
The location switcher isn't showing my new location
Symptom:added a location on /settings/locations but the dashboard switcher doesn't list it. Cause: the dashboard has cached the old location list, or the new row is marked inactive (it shouldn't be — Active is the default — but worth checking). Fix: hard-refresh the dashboard tab (Cmd+Shift+R on Mac, Ctrl+Shift+R on Windows). If still missing, go back to /settings/locations and confirm the row shows the Active badge. Toggle it off and on if not.
A team member can't see a location they should
Symptom: staff member reports they can only see inventory for one store when they should see two. Cause: the member has a location restriction set on /settings/team that excludes the second location. Fix:open /settings/team, click the member, open the location-restriction modal, and either tick the second location or clear all restrictions (which means “sees everything”). The change applies on the member's next request.
Default location doesn't persist between sessions
Symptom: the location switcher resets to a different store every time the page reloads. Cause: the current location is stored per-session, not per-user. Fix:the switcher remembers your last selection for the current browser session; after a full sign-out it reverts to the tenant's first active location. If you need a member to always default to a specific location, set their default location on /settings/team — that overrides the session-based reset on fresh sign-in.
Can't delete a location
Symptom:delete button shows an error like “has linked sales / repairs / inventory”. Cause: Nexpura blocks deleting a location that has historical records pointing at it — otherwise those records would lose their location reference. Fix: either reassign the records (transfer inventory out, close out repairs) and then delete, or archive the location instead by toggling it inactive. An inactive location stays in the database for history but disappears from the switcher.