Inviting your team
Add owners, managers, staff, and technicians with the right role and permissions for their part of the store.
Quick reference
- Team list lives at
/settings/team. - Four roles: Owner, Manager, Staff, Technician. The role options dropdown for new invites offers Manager, Staff, and Technician (Owner is reserved for the account creator).
- Permissions are role-defaulted but per-tenant tunable on
/settings/team/permissions(Owner-only). - Invite emails contain a token that expires in 7 days. Stale invites can be re-sent from the team list.
- Staff and technician roles can be restricted to specific locations; Owner and Manager always see everything.
Walkthrough
1. Open the team page
Navigate to /settings/team. The page lists current team members with their role badge, email, last login, and invite status (Active, Pending, or Expired). On a fresh tenant, the only row is the account owner — that's you.
Screenshot pending
The /settings/team page on a fresh tenant, showing the owner row and the Invite member button.
2. Invite a new member
Click Invite member. A panel opens with three fields: name, email, and role. Fill in the name (used in the invite email subject line), the work email (where the invite link goes), and the role dropdown.
Screenshot pending
The Invite member panel with name, email, and role dropdown (Manager / Staff / Technician).
3. Pick the right role
The three role options when inviting:
- Manager — sees and edits everything except owner-only settings (the permission matrix, billing, account deletion). Manage day-to-day operations across all locations.
- Staff — basic POS, customer, and inventory access. Suitable for floor staff and most front-of-house roles. Default permissions; tweakable on the matrix page.
- Technician — workshop-focused. Sees repairs, bespoke jobs, and the intake workspace. Limited access to POS and customer records by default.
You can change a member's role later from the same page, with one exception: the Owner role can't be re-assigned through the UI. If ownership needs to transfer, contact us.
4. Send the invite
Click Send invite. Nexpura generates a single-use invite token (valid for 7 days) and emails the link to the address you entered. The new row appears in the team list with a Pending badge.
Screenshot pending
Team list with a freshly-invited member showing the Pending badge.
5. (Optional) Restrict to specific locations
Click the location-pin icon on the new member's row. A modal lists every active location for your tenant. Tick the ones this member should see; leave them all unticked (or click Clear) to give access to every location. Save.
Restrictions apply to Staff and Technician roles. Owner and Manager always see all locations regardless of what's ticked.
Screenshot pending
Location-restriction modal with a multi-location tenant showing tickboxes for each store.
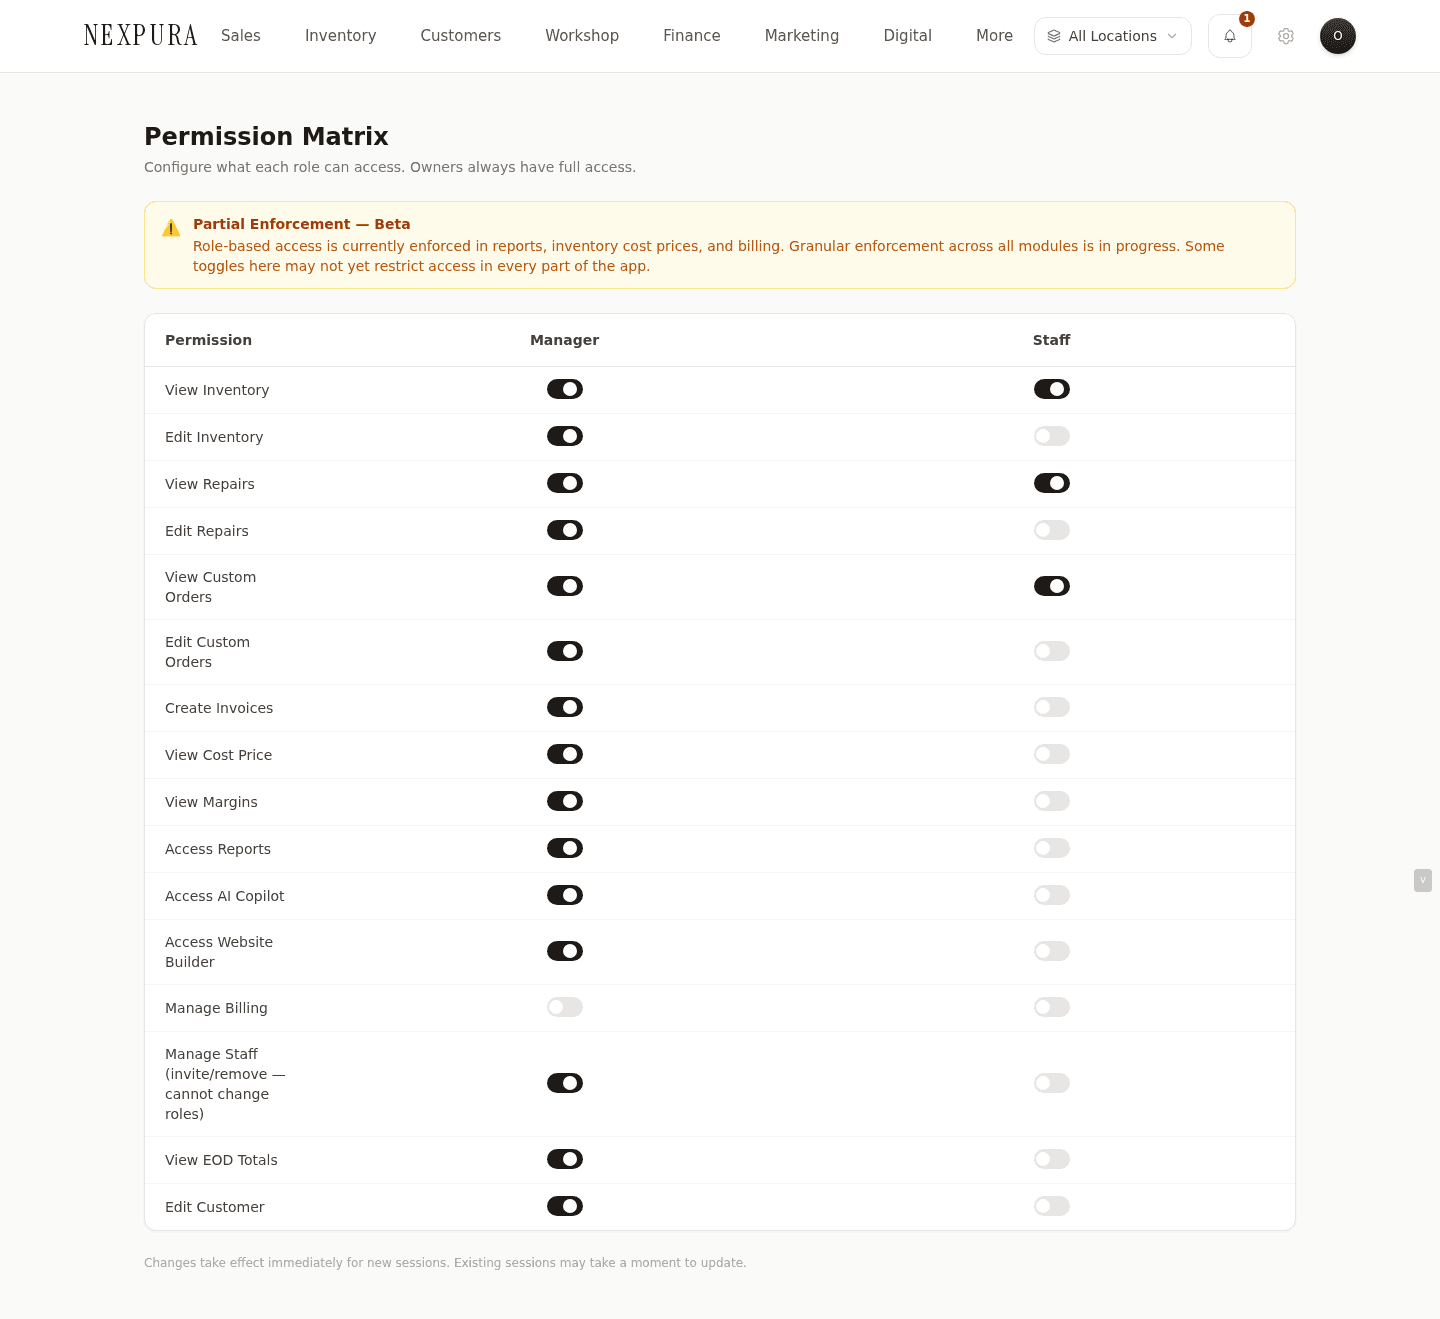
6. (Optional) Tweak permissions on the matrix
The default permissions per role cover most stores, but if you need fine-grained control (e.g. staff who shouldn't see repair financials, technicians with no inventory edit), open /settings/team/permissions. The matrix lists every permission key down one axis and every role (except Owner) across the top. Tick or untick to override the role's default. The page is Owner-only — Managers can't access it.
7. The invitee accepts
The invitee clicks the link in their email, sets a password, and lands at your workspace. Their row on /settings/team flips from Pending to Active, and their last-login timestamp starts populating from their first sign-in.
Screenshot pending
Team list with the previously-pending member now showing Active and a last-login date.
Common questions
What roles are available?
Owner, Manager, Staff, Technician. Owner is the highest-power role and can do everything including managing billing and the permission matrix; it's the role assigned to the account creator at signup. Manager handles day-to-day operations without billing access. Staff is the default for floor and counter team. Technician is workshop-focused with reduced POS access.
Can I create a custom role?
Not as a wholly new role with its own name. The four roles above are the fixed set. What you can do is tune the permissions per role on the matrix (/settings/team/permissions) — that gives you per-tenant control over what Staff or Technician can actually do, which covers most of what a “custom role” would mean in practice. If you need a genuinely new role with its own label and badge, get in touch — we're tracking that ask.
Can I restrict a team member to one location?
Yes — see step 5 above. Click the location-pin icon on the member's row and tick only the locations they should see. The restriction applies to inventory, repairs, sales, and reports. Owner and Manager roles always see every location; the restriction only meaningfully applies to Staff and Technician.
How long is an invite valid?
7 days from when it's sent. After that, the token expires and the row shows Expired on the team list. Click Resend invite on the expired row to issue a fresh 7-day token to the same address.
Is there a limit on how many team members I can invite?
Yes — your plan caps it. The team page shows your current count against the plan ceiling near the header. Boutique is single-user; Studio and Atelier raise the cap. When you hit the cap, Invite member disables with an upgrade prompt. Open /billing to upgrade.
Troubleshooting
The invite email never arrives
Symptom:invitee reports they haven't received the email an hour after you sent it. Cause: spam filter or a typo in the address. Fix: ask them to check spam; on /settings/team click Resend invite on their row to issue a new email. If the address has a typo, you'll need to delete the pending row and start over with the correct email — invites don't support an email edit.
Invitee can't accept the invite
Symptom:the link in the invite email lands on an error page or says “invite expired.” Cause: the token has passed its 7-day window, or the link has already been used. Fix: on /settings/team find the Expired row and click Resend invite. A new token goes out with a fresh 7-day window. If the link says “already used”, the invite was accepted — the member should sign in normally at /login.
Wrong role assigned
Symptom: the new member has too much (or too little) access compared to what you intended. Cause: wrong role selected at invite time. Fix:on /settings/team click their row, change the role dropdown, save. Permission changes apply on the member's next request — they may need to refresh their browser to see new menu items appear or disappear.
Permission tweak on the matrix isn't applying
Symptom: you unticked a permission for Staff on /settings/team/permissions but a staff member still has access to that feature. Cause:the staff member's browser has cached the old permission state, or the page change didn't save (look for the save toast). Fix:verify the matrix actually saved (you'll see a success toast); ask the staff member to hard-refresh (Cmd+Shift+R / Ctrl+Shift+R) or sign out and back in. If still applying old permissions, check the matrix page hasn't reverted to defaults (some browsers' back/forward cache can show stale state briefly).